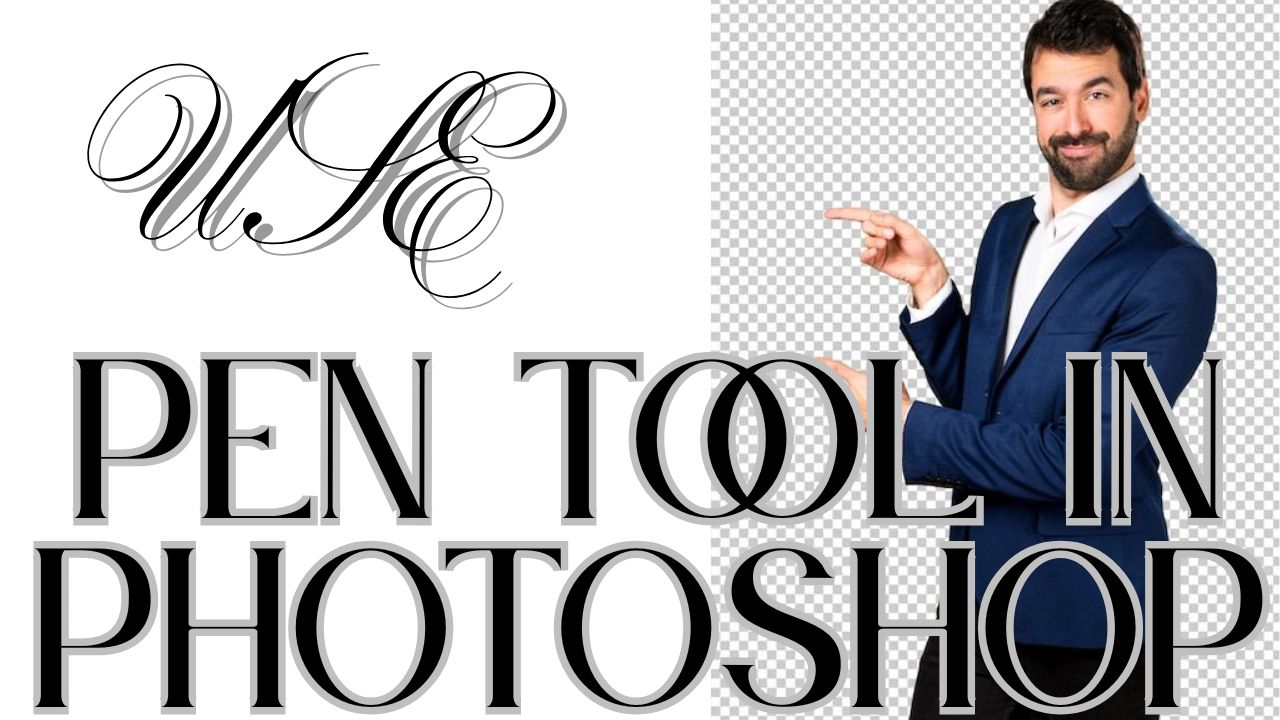

Why the Pen Tool Scares Everyone (But Shouldn’t)
Ever looked at the Pen Tool in Photoshop and just… backed away slowly? Don’t worry, I’ve been there too. It looks intimidating. But once you get it, it’s like riding a bike you never forget. And trust me, your designs will thank you for learning it.
The Pen Tool seems scary, but it’s the most accurate way to cut out or trace things in Photoshop.
What is the Pen Tool in Photoshop?
The Basics: A Quick Overview
The Pen Tool is a path-creating tool that lets you draw straight lines, curves, and complex shapes by placing anchor points. Sounds fancy, right? But it’s basically digital tracing paper.
The Pen Tool draws paths using anchor points to create precise shapes and selections.
Why It’s So Precise (And Worth the Effort)
It gives you razor-sharp control. Unlike the quick and messy Lasso Tool, the Pen Tool is all about precision. Think of it like a scalpel versus a butter knife.
It’s slower than other tools—but a hundred times more accurate.

When and Why You’ll Actually Use the Pen Tool
Real-World Use Cases
Ever need to cut out a product with perfect edges for an eCommerce listing? Or trace around a model’s hair without making it look jagged? That’s where this shines.
Use it for complex cutouts, logos, illustrations, and clean paths.
Why It Beats Other Selection Tools
Magic Wand and Quick Selection are fast but clumsy. The Pen Tool lets you zoom in, trace exactly where you want, and tweak every curve.
It’s slower but gives pro-level results without jagged edges.
Getting Comfortable: Opening Up the Pen Tool
Where to Find It
It’s in your toolbar—icon looks like an old-fashioned pen nib. Or just press P on your keyboard. Boom. You’re in.
Find it in the toolbar or hit “P” on your keyboard.
Customizing the Settings
Choose “Path” instead of “Shape” if you just want to trace without filling in colors. Trust me, it avoids confusion when you’re just trying to make selections.
Set the Pen Tool to “Path” mode for clean, editable outlines.
Step-by-Step: How to Use the Pen Tool in Photoshop
Step 1: Select the Pen Tool
Simple. Just click the icon or press P. Get used to that keyboard shortcut it’ll be your best friend.
Step 2: Start with Simple Shapes
Draw a triangle or a box. Click once to drop a point. Click again to create a line. Keep clicking to finish the shape.
Click around simple objects to practice placing points and closing paths.
Step 3: Mastering Anchor Points
Each point you drop has handles. These let you control curves. You can adjust these handles after placing the point or while placing it by dragging instead of just clicking.
Anchor points with handles control how straight or curved your path is.
Step 4: Drawing Curves with Confidence
This is the part that trips everyone up. Drag when placing your anchor to get a curve. If the curve goes wild, just undo (Ctrl+Z) and try again.
Click and drag to create curves don’t panic if it looks weird at first.
Step 5: Closing Paths Like a Pro
To close the shape, hover over your first point until you see a small circle next to your cursor. Click to complete it.
Close the path by clicking your first point again it’ll lock in the shape.
From Path to Selection: Turning Your Work into Magic
How to Make a Selection
Once your path is done, right-click inside it and choose “Make Selection.” You can now copy, mask, or cut the area.
Right-click > “Make Selection” to turn your path into a usable cutout.
Saving and Reusing Paths
Open the Paths panel and name your path. Save it. You’ll thank yourself when you need to go back and fix something later.
Save paths in the Paths panel for future editing.
Advanced Tricks (That Make You Look Like a Pro)
Using the Convert Point Tool
This tool lets you click on any curved point and turn it into a sharp corner or vice versa. Super handy for fixing weird curves.
Convert curves to corners and back using the Convert Point Tool.
Modifying Paths on the Fly
Hold Ctrl/Cmd to move points around, even after placing them. This is great for fine-tuning.
Hold Ctrl/Cmd to move or tweak anchor points.
Combining Paths for Complex Objects
You can draw multiple paths, then combine them using Shape Modes or Path Operations. Makes selecting intricate stuff way easier.
Combine paths to trace complex shapes in sections.
My Personal Journey with the Pen Tool
The First Time I Used It (Spoiler: It Was a Disaster)
I remember trying to trace a sneaker for a catalog. I made about a hundred random points, none of them aligned. I gave up and used the Magic Wand.
What Finally Clicked for Me
Later, I watched a speed edit where someone used only 10 points to trace a perfect curve. That’s when I realized it’s not about placing more points. It’s about placing them better.
Common Mistakes Beginners Make (And How to Avoid Them)
Rushing Through Curves
Slow down. Zoom in. Trust your hand. Curves need time and finesse not speed.
Smooth curves come from patience, not rushing.
Not Zooming In Enough
You can’t be accurate from 100% view. Zoom to 300% or more. Details matter.
Zoom in close to place points precisely.
Over complicating Simple Shapes
Fewer points = smoother paths. Only place a new point when you need to change direction.
Use fewer points to keep your paths smooth and editable.

Quick Tips for Speed and Precision
Use the Space bar for Quick Adjustments
While placing a point, hold space bar to move it before clicking. Life-saving trick.
Use space bar to adjust point placement before locking it in.
Practice on Logos or Icons
Start small. Trace simple logos or icons to build muscle memory.
Practice tracing icons to build confidence without frustration.
Conclusion: You’ve Got This
Look, the Pen Tool isn’t magic but it’s close. Once you’ve practiced a bit, it starts to feel like second nature. You’ll wonder how you ever lived without it. So grab a coffee, open Photoshop, and start clicking. You’ve got this.
FAQs
Is the Pen Tool better than the Lasso Tool?
Yes—for clean, editable selections. The Lasso is faster, but the Pen Tool is more precise.
What’s the fastest way to get good at the Pen Tool?
Practice every day. Trace logos, objects, or even screenshots. It’s like learning guitar—reps matter.
Can I use the Pen Tool for editing photos or just graphics?
You can totally use it for photos—especially product cutouts, portraits, or background removals.
How do I fix a mistake while drawing a path?
Hit Ctrl+Z to undo. Or hold Ctrl to move the anchor point. Easy fixes.
Does the Pen Tool work the same in Photoshop Elements?
Photoshop Elements doesn’t have the full Pen Tool—but you can use similar shape tools to mimic its effect.
Some images in this content are taken from Pinterest.com.