
Have you ever seen a clean product photo with no background? That’s the magic of a clipping path service. I first tried it in Photoshop years ago, editing a photo for an online store. It felt like cutting shapes with a mouse—but the result looked sharp and pro. Since then, I’ve worked with clients in the USA, India, and beyond. In this guide, I’ll explain what a clipping path service is, how it works, and how to pick the best one for your needs.
What Is Clipping Path Service?
A clipping path service is a way to cut out an object from its background in a photo. It uses a closed vector path, often made with the Pen Tool in Photoshop, to keep what you want and remove the rest. This is helpful when you need clean, sharp images—especially for online stores, ads, or catalogs.
I still remember when I first heard the term “clipping path.” I was helping a friend launch a small eCommerce shop. He had great products but messy photos with wrinkled backdrops. We tried editing them ourselves using Photoshop, learning as we went. That’s when I found out how much of a game-changer this service could be. It felt like turning rough snapshots into professional product shots with just a few clean cuts.
At its core, a clipping path helps isolate the subject so it stands out. Whether it’s for a fashion brand or a product on Amazon, this small step can make a huge difference in how people see your image. It gives your photo that crisp, polished look buyers expect. That’s why it’s such a must-have in the world of visual content today.

What Does a Clipping Path Do?
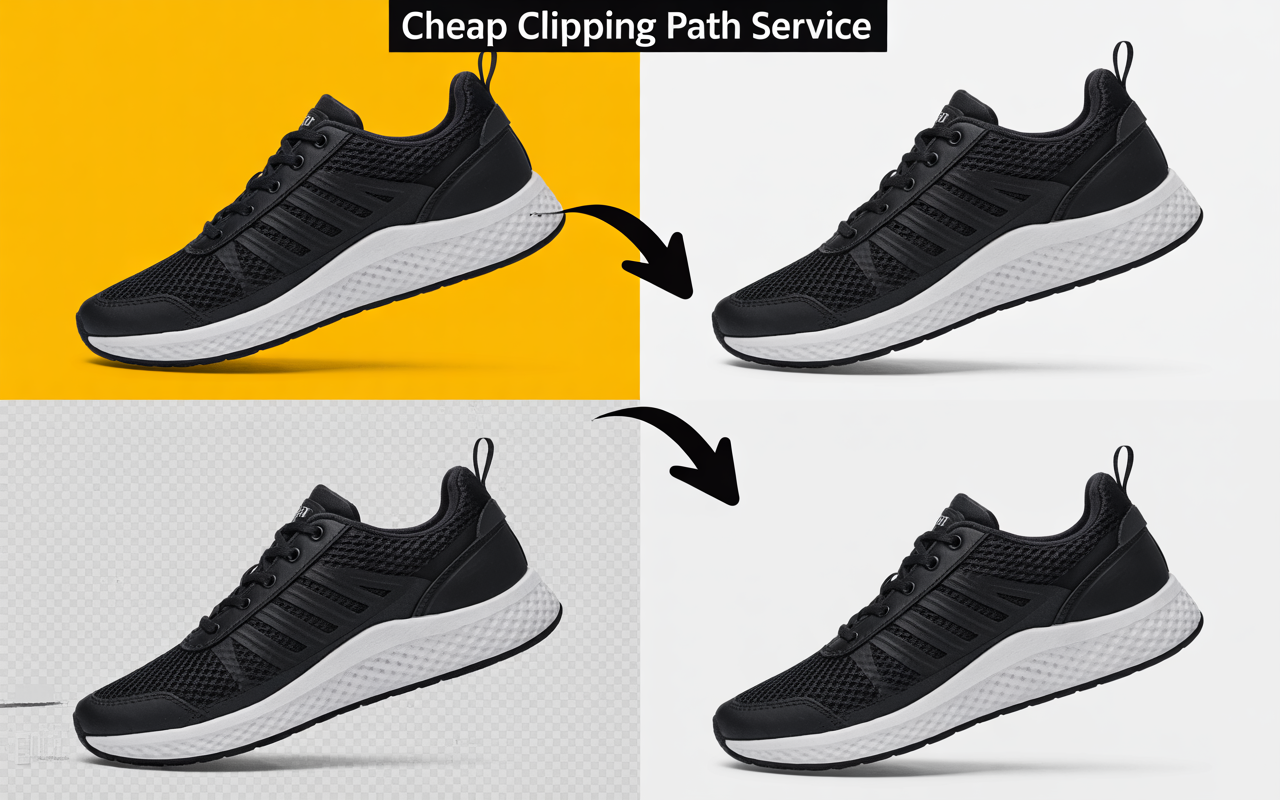
A clipping path removes the background from a photo so the subject stands alone—clean, sharp, and ready to shine. It’s like tracing around a product with digital scissors and tossing everything else aside. That’s the core idea.
Let’s say you have a product photo with a messy backdrop wrinkles, shadows, or distractions. With a clipping path, you keep only the item and erase the rest. It’s how online stores get that crisp, all-white background that makes products pop.
In simple terms: a clipping path isolates what you want to show and hides what you don’t. That’s why it’s a must-have for e-commerce, catalogs, social media, and print ads.
I remember a project where a client sent over hundreds of jewelry photos taken on a dark velvet background. The products were beautiful, but the photos? Not so much. I applied clean clipping paths to each image and replaced the background with pure white. The before-and-after difference was like night and day—suddenly, the jewelry looked premium and ready for Amazon. The client even told me, “These look like magazine shots now!”
Clipping paths help turn everyday photos into professional assets. Whether you’re selling clothes, shoes, furniture, or food, this one step can lift your entire brand image. It’s not just about deleting a background—it’s about controlling the way people see your product.
Clipping Path in Photoshop: How It Works
Related keyword: What is clipping path service in Photoshop?
So, what is a clipping path service in Photoshop? In simple words: it’s a way to cut out an object from a photo using a path. This lets you remove the background and keep only what you want—like a clean product for an online store. It’s like using a digital craft knife with pixel-level precision.
I remember the first time I used Photoshop’s Pen Tool to trace around a product. I was nervous. One wrong click, and the curve would go haywire! But once I got the hang of it, it felt smooth—almost like outlining a shape with steady hands on paper. Suddenly, the messy photo turned into something sharp and store-ready.
Step-by-Step: How Clipping Path Works in Photoshop
Here’s how it works, step by step:
- Open the image in Photoshop.
- Choose the Pen Tool (shortcut: P).
- Carefully trace around the object by clicking to create anchor points.
- When you’ve outlined the entire shape, close the path.
- Go to the Paths panel, save the path, and turn it into a selection.
- From there, you can create a layer mask or just remove the background.
That’s the short version, but the key is precision. Even one tiny mistake—like cutting into the edge of a shoe or missing a hair strand—can ruin the result. That’s why clipping paths are often done manually, not with quick selection tools.
A clipping path in Photoshop is a vector outline created with the Pen Tool to isolate an object and remove the background cleanly.
Tools Involved: Why the Pen Tool Matters
The Pen Tool is your best friend here. It might feel tricky at first, but once you understand how to curve and control anchor points, it becomes second nature. The Paths panel is where your work is saved, like keeping all your paper cutouts safe in a folder.
Honestly, I’ve tried other selection tools—the Magic Wand, Quick Selection, even AI tools—but none match the accuracy of a hand-drawn clipping path. It gives full control, especially when working with curves, product edges, or intricate shapes like earrings or flower petals.
The Pen Tool and Paths panel in Photoshop help you draw precise outlines around objects to create clean cutouts.
Why Photoshop Is Still the Industry Standard
People often ask, “Can’t this be done with free tools or AI now?” Sure, there are quick tools out there. But for pro-level results—especially in e-commerce, fashion, or print—Photoshop is still king.
Why? Because Photoshop gives you:
- Pixel-level precision
- Full control over curves and shapes
- Editable paths and layer masks
- Clean exports for web and print
Even with AI tools improving fast, most top photo editors still rely on Photoshop for this task. It’s tried, tested, and trusted.
I’ve used it on thousands of images—everything from jewelry to shoes to furniture. Each time, I know the clipping path will give me the clean, professional look that clients expect. No shortcuts, just sharp results.
Photoshop remains the top choice for clipping path services due to its unmatched precision, control, and industry trust.
What Is a Clipping Path in Illustrator?
Related keyword: What is clipping path in Illustrator?
So, what is a clipping path in Illustrator?
In simple terms: it’s a way to hide parts of your design using a shape—kind of like placing a mask over a photo to only show what’s inside the cutout. Think of it as creating a paper window over an image. Whatever fits inside that window stays visible. Everything else? Hidden.
Unlike Photoshop, where we use the Pen Tool to cut out objects, Illustrator uses clipping paths to contain them. It’s like putting a photo inside a frame rather than trimming the edges.
Illustrator vs. Photoshop: What’s the Difference?
Here’s where it gets interesting. Both tools talk about “clipping paths,” but they work very differently. In Photoshop, a clipping path is about precision cutting—removing backgrounds with pixel-perfect detail. It’s great for raster images like product photos.
In Illustrator, the clipping path works more like a shape-based container. It’s not really cutting anything. It just hides parts of objects outside the path. You’re dealing with vector graphics, not photos. So the logic changes.
I still remember the first time I tried this in Illustrator. I was editing a logo file a client had sent. The background was messy, but instead of erasing anything, I just created a circle and used it as a clipping mask. Boom—only the circular part of the design stayed visible. No pixels were harmed.
When to Use Illustrator-Based Clipping Paths
Use Illustrator when you’re working with vectors—logos, icons, typography, or scalable illustrations. That’s where it shines.
Let’s say you have a big pattern, but you only want to show a small part inside a specific shape—maybe a triangle or a text frame. Instead of deleting the rest, you just apply a clipping path. It’s clean, non-destructive, and editable anytime.
I’ve used this trick many times when preparing files for print—especially when working on product packaging. You want everything to stay crisp no matter the size. Vector clipping paths let you do that without losing quality.
Snippet-friendly answer:
A clipping path in Illustrator is a vector shape used to mask or hide parts of your design, showing only the content inside the path. It’s often used to crop vector art cleanly without deleting anything.
Quick comparison summary:
| Feature | Photoshop Clipping Path | Illustrator Clipping Path |
| Used for | Raster images (photos) | Vector artwork (logos, illustrations) |
| Tool used | Pen Tool | Shape tool or custom path |
| Goal | Remove background | Hide parts outside the shape |
| Destructive? | Yes (usually cuts out) | No (non-destructive masking) |
| Best for | E-commerce photos | Print layouts, logos, icons |
So yeah—Photoshop cuts, Illustrator masks. Both are called “clipping paths,” but they serve different purposes. Once you understand the logic behind each, it becomes second nature.
I still use both every week, depending on the job. One helps clean up photos, the other keeps vector designs tidy. Knowing when to switch tools? That’s part of the craft. icons, or illustrations that need to be masked without losing resolution. It’s ideal for design projects where scalability matters—like packaging, web graphics, or print materials.
For example, if a client sends you a vector logo but wants only part of it displayed inside a custom shape, Illustrator’s clipping path does the trick. It doesn’t delete anything—it just hides the parts outside your shape. That means the original artwork stays intact, which is great for future edits.
Short answer for snippet:
A clipping path in Illustrator is a vector shape used to mask or hide parts of objects, showing only what’s inside the path.
Types of Clipping Path Services
Not all clipping paths are the same. Some are simple. Others? Much more detailed. It all depends on what kind of photo you’re working with—and how precise the selection needs to be.
- Basic Clipping Path
This is for simple shapes with no holes or curves—think boxes, bottles, or basic products. It’s fast, clean, and often used for standard e-commerce photos. - Complex Clipping Path
When a photo has curves, holes, or intricate edges—like a bike, a chair with gaps, or hair details—you need a more detailed path. It takes longer, but the results look natural and professional. - Multiple Clipping Paths
This is where things get interesting. Instead of one path around the whole object, you create separate paths for different parts. Why? To apply different edits—like color changes or layer masking.
🔍 Real Client Case: Fashion Catalog Project
I once worked on a fashion shoot where the client needed each part of the clothing—shirts, collars, buttons, even inner lining—on a separate layer. We used multiple clipping paths so they could change colors for seasonal variations. One shirt, six colors, one shoot. The brand saved a ton of time and money.
Snippet-ready definition:
Multiple clipping path service means creating separate paths for different parts of an image, useful for color changes, layer masks, and complex edits.
Who Needs Clipping Path Services?
Short answer:
Clipping path services are for anyone who needs clean, cut-out images—like photographers, eCommerce sellers, ad agencies, and printing companies.
Let me be real with you. The first time I heard about “clipping path,” I had no clue what it meant. But the more I worked with product photos, the clearer it became. If you want clean, pro-level images, this service is gold.
Photographers
If you’re a photographer, you’ve been there. You take the perfect shot, but the background ruins it. Maybe it’s messy. Maybe it’s just not what your client wants. That’s when a clipping path saves the day.
Answer-ready: Clipping paths help photographers cut out the subject and place it on a clean background.
I once worked with a wedding photographer. He sent me hundreds of portraits. We used clipping paths to remove the cluttered backdrops and gave him crisp, timeless shots.
eCommerce Sellers
Selling online? Then you know how vital good photos are. People won’t click on a product if it looks messy. Sites like Amazon or Shopify have strict image rules.
Answer-ready: eCommerce sellers use clipping paths to remove backgrounds and meet platform standards.
I’ve helped sellers boost their sales just by cleaning up their photos. One client even said, “My click-through rate doubled!” Clean images = more trust.
Ad Agencies
Agencies need pixel-perfect work. Whether it’s a billboard or a social media ad, they want full control over how things look.
Answer-ready: Ad agencies need clipping paths to edit each part of an image for creative campaigns.
One agency I worked with needed to swap product colors fast. We used multiple clipping paths so they could make red, blue, and green versions in one go. Fast edits, big results.
Printing Companies
In print, every detail matters. Edges must be sharp. Images need to fit layouts just right. That’s where paths come in.
Answer-ready: Print companies use clipping paths to prep images for high-quality printing.
I’ve worked with print houses on catalogs, flyers, and packaging. They love how clean clipping paths make their final work look. It’s all about quality.
Real-World Experience: Clipping Path Job Examples
I’ve handled jobs for all of these clients. One week it’s a jewelry brand. Next week, it’s a fashion shoot. Sometimes it’s 10 images. Other times? 1,000+.
Answer-ready: Clipping path jobs range from simple cutouts to complex edits across large image volumes.
It’s not always easy—but it’s always rewarding. Clean images help brands look sharp. And helping clients feel proud of their product photos? That never gets old.
Want to know if this service is for you? Ask yourself this:
“Do I need clean, pro-level images without distractions?”
If yes, then yes—you need clipping path services.
Choosing the Best Clipping Path Service Company
Related keyword: How to choose the best clipping path service company?
What Should You Look For?
Let’s be real—there are tons of companies out there offering clipping path services. Some are amazing. Some… not so much. So how do you choose the right one?
Here’s what really matters:
- ✅ Quality of Work
Always ask for samples. Zoom in. Check the edges. Are they clean and natural, or jagged and rushed? Precision is everything. - ⏱️ Turnaround Time
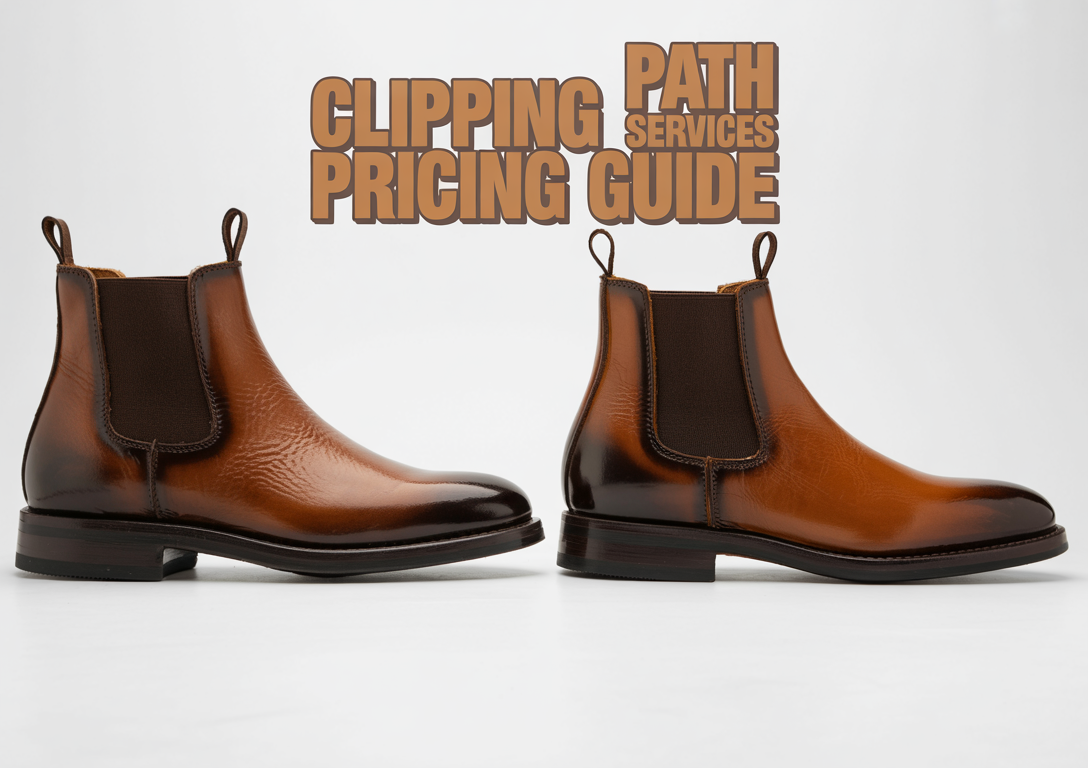
Need images in 6 hours? 24? Make sure they can deliver your speed without sacrificing quality. - 💰 Transparent Pricing
Look for clear pricing (no hidden fees). Some charge by image complexity—basic, medium, complex. Others offer bulk discounts. - 🧪 Free Trial Option
A free trial is like a test drive. If a company won’t let you try before you buy, that’s a red flag. - 🧑💻 Customer Support
Do they respond fast? Are they helpful? Great service matters just as much as great edits.
My Insider Tips: Red Flags & Must-Ask Questions
Having worked in this industry for years, I’ve seen the good, the bad, and the “what were they thinking?”
Here’s what I recommend:
- Watch out for ultra-low prices. If it’s too cheap, they may be cutting corners or using fully automated tools without human touch.
- Ask: “Do you hand-draw paths or use AI?” For top-tier quality, hand-drawn paths still win—especially for detailed images.
- Check time zone overlap. If you’re in the U.S. and the team is in Asia, make sure there’s some overlap in your working hours for feedback and revisions.
How to Evaluate the “Best Clipping Path Service”
Related keyword: Best clipping path service – how to evaluate
Everyone claims to be the best—but here’s how to actually tell:
| Criteria | What to Look For |
| Portfolio | Real before-after samples, not just mockups |
| Client Reviews | Verified testimonials on Google, Trustpilot, etc. |
| Scalability | Can they handle 10 images and 10,000? |
| Specialization | Do they focus on your niche (e.g., fashion, jewelry, eCommerce)? |
| Secure Delivery | Encrypted file sharing, privacy policies in place |
Snippet-Ready Answer:
How do I choose the best clipping path service company?
Look for clean quality, fast turnaround, transparent pricing, and strong customer support. Always test with a free trial and ask if paths are manually drawn.
Geographic Insights: USA vs. India
Let’s talk about something people don’t always bring up: where your clipping path service provider is located can make a difference but maybe not in the way you think.
When I first started outsourcing, I assumed that working with a U.S.-based company meant better quality. After all, “Made in the USA” has a certain ring to it. But I quickly learned that location doesn’t always equal quality. What matters more is the team behind the screen.
Working With U.S.-Based Providers
There’s something comforting about working in the same time zone. You send files in the morning and get edits back before lunch. Communication is usually fast, and expectations align more easily. I once worked with a boutique agency in New York. Their team was small, but the quality was top-notch. The downside? The cost. Per image, they charged 3–4 times more than offshore teams.
If your budget allows and your project needs real-time feedback or tight turnaround during U.S. hours, a clipping path service in the USA might be worth it. Just be ready to pay a premium.
Working With Teams in India and Bangladesh
Now, let’s talk about the other side of the coin. Clipping path services in India and Bangladesh have become world-class. These countries have built a reputation for high-volume, hand-drawn clipping paths at competitive prices. I’ve worked with several teams in Dhaka who delivered thousands of images flawlessly—overnight.
Sure, there’s a time difference. But honestly? That can work for you. You send files before bed and wake up to finished edits. It feels like magic.
The key here is communication. Not every offshore team is great at it, so you need to vet them well. I always ask for a free trial and set clear expectations upfront. When you find the right partner, you get expert-level results at a fraction of the cost.
Comparing the Two
So which is better? It depends.
If you need fast edits, speak the same language, and don’t mind paying more, go with a clipping path service in the USA.
If you want bulk edits, competitive pricing, and are okay with some timezone juggling, a clipping path team in India or Bangladesh is a smart move.
I’ve had success with both. One time, I sent a fashion shoot to a U.S. team for a high-end catalog. Another time, I worked with a Bangladeshi studio that edited 5,000+ product images in under 48 hours. Both nailed it—but in different ways.
Other Names for Clipping Path
Related keyword: What is another name for a clipping path?
You might’ve heard other names tossed around that basically mean the same thing as a clipping path. These are common in different industries or regions.
Short answer:
Another name for a clipping path is “deep etching,” “siloing,” or “background removal.”
Let’s break it down:
- Deep Etching: This term is used a lot in Australia and parts of Europe. It’s the same process—cutting out an object from its background.
- Siloing: Common in print and publishing, this refers to isolating an object (“siloed”) for layout use.
- Background Removal: This is the everyday, easy-to-understand version. No technical lingo—just take the background out.
Quick note:
Not all background removal involves clipping paths. Some use masking, AI, or other tools. So while the terms overlap, they’re not always identical. Clipping paths are all about clean, vector-based cutouts, especially for sharp edges.
My Real-World Experience With Clipping Path Services
Here’s where I get real with you.
How I Got Into It
When I first started editing photos, I struggled with getting pro-level results. Blurry edges. Messy cutouts. Then someone introduced me to the Pen Tool in Photoshop—and the idea of “clipping paths.” Game changer.
I started offering clipping path services to clients who needed clean product shots. And guess what? Word spread. I went from editing 10 images a week to handling high-volume projects for eCommerce stores, photographers, and ad agencies.
Tools I Use
- Photoshop Pen Tool: My go-to. Precision is everything.
- Wacom tablet: For detailed, hand-drawn paths.
- Batch processing scripts: Helps with large-scale editing.
- Project tracking tools: Like Trello or ClickUp for managing bulk jobs.
My Workflow
- Client sends images + instructions
- I review and sort by complexity
- Manual clipping paths drawn using Pen Tool
- Quality check on every image (zoomed in, edge by edge)
- Delivery in requested formats (PSD, PNG, JPG, TIFF—you name it)
Challenges I’ve Faced
- Crazy deadlines (think: 2,000 images in 24 hours)
- Super complex jewelry with reflections and fine chains
- Miscommunication about file specs or edits (always triple check!)
Success Stories
- Helped a fashion brand prep their entire summer catalog in 3 days
- Saved a wedding photographer’s season by editing 800+ portraits in 48 hours
- Partnered with an Amazon seller whose product listings went from ignored to top-sellers—just from clean images
My Real-World Experience With Clipping Path Services
Let’s get personal for a minute.
How I Got Into It
When I first started out in photo editing, I had no idea what a “clipping path” even was. I just knew my edits looked… off. Messy edges, uneven cutouts, nothing looked clean enough for professional use.
Then a designer friend showed me the Pen Tool in Photoshop—and it clicked. Suddenly, I had precise control. I could cut out products pixel by pixel. That’s when I discovered what clipping path services were really all about: clean, pro-quality isolation that makes products pop.
What started as fixing my own edits turned into something bigger. I began offering clipping path services to clients. At first, it was just a few product images here and there. Then came photographers. Then eCommerce brands. Before I knew it, I was managing high-volume projects with tight deadlines and real stakes.
Tools I Use
This isn’t magic—it’s just the right tools, used the right way.
- Photoshop + Pen Tool – The gold standard for clean paths
- Wacom Tablet – Makes hand-drawn paths smoother and faster
- Batch Processing Scripts – For efficiency at scale
- ClickUp/Trello – To keep projects on track, especially with hundreds or thousands of files
- Bridge or Lightroom – For sorting and batch reviewing images before edits
My Clipping Path Workflow
Every project follows a structure. That’s how I keep quality consistent—even when dealing with thousands of images.
- Client sends images + instructions (file types, output formats, background needs)
- I sort images by complexity – basic, medium, or complex
- Hand-draw clipping paths using the Pen Tool (no shortcuts!)
- Zoomed-in quality check – every edge, every detail
- Export & deliver in formats like PSD, PNG, or TIFF, with or without shadows, depending on need
Turnaround time? Depends on volume. But I’ve handled urgent requests—2,000 images in under 24 hours—without compromising on edge quality.
Real-World Challenges
It’s not always smooth sailing. Here are some curve balls I’ve faced:
- Jewelry edits – Tiny chains, shiny stones, overlapping reflections? Nightmare—but doable with patience.
- Last-minute rush jobs – Clients needing edits yesterday. Speed matters, but quality always wins.
- Mismatched expectations – Wrong file specs or missing instructions can kill momentum. I’ve learned to double-confirm everything upfront.
Success Stories
Here are just a few highlights I’m proud of:
- ✅ Fashion Catalog – Helped a brand prep 500+ images in 3 days. Clean edits made their look book look premium.
- ✅ Amazon Seller Boost – One client saw a 40% uptick in sales just from swapping in clean, white background images.
- ✅ Wedding Photographer Rescue – Edited over 800 portraits in 48 hours to meet an urgent delivery deadline. Saved their entire season.
- ✅ Large-Scale eCommerce Prep – Managed 10,000+ product images in phases for a global online store with consistent quality checks.
Clipping path work isn’t glamorous—but it’s essential. And with the right tools, process, and care, it becomes the backbone of stunning, high-performing visuals.
Let me know if you want me to turn this into a downloadable case study or infographic for your site!
FAQs
(Optimized for featured snippets & voice search)
What does a clipping path do in Photoshop?
A clipping path cuts out an object from its background using the Pen Tool in Photoshop.
Imagine you’re slicing a photo with a digital scalpel—that’s pretty much what a clipping path does. I remember the first time I used it on a product shot: suddenly, the messy background was gone, and the item looked ready for an online store. It felt like turning a snapshot into a studio-quality image.
What is the purpose of a clipping path?
The purpose is to isolate part of an image so you can remove or replace the background.
This is huge in product photography. Say you’re selling shoes online you need clean, white backgrounds to meet Amazon’s rules. That’s where clipping paths shine. I’ve done this for thousands of images, and it always amazes clients how much cleaner and more “pro” their visuals look afterward.
Is clipping path the same as background removal?
Not exactly—clipping path is one method of background removal, using precise vector paths.
Think of background removal as the goal, and clipping path as one of the tools to get there. I use paths when I need sharp, crisp edges—like for furniture, phones, or shoes. But for hair or fur? That’s where I switch to masking. The tool depends on the texture and detail.
What is the difference between clipping path and masking?
Clipping paths use vector lines for sharp edges; masking uses pixel-level detail for soft edges.
It’s kind of like scissors versus airbrush. I use clipping paths for solid, hard-edged objects, and masking for anything fuzzy—like a model’s hair or a fluffy coat. I once tried to use a path on a dog photo. Big mistake. Masking saved the day!
What software is best for clipping paths?
Adobe Photoshop is the industry standard for creating clipping paths.
Hands down, Photoshop is my go-to. The Pen Tool gives me full control, and it integrates well with batch processing. I’ve dabbled in other tools, but nothing matches Photoshop’s precision and reliability. If you want pro results, this is the software to learn.
How do I know if I need a clipping path?
If you need clean cutouts with sharp edges—like for product listings—you need a clipping path.
A good rule of thumb: If the background looks messy or distracting, and the object has clear edges, a clipping path will fix it. I had a client once who didn’t realize their dull photos were hurting sales. We cleaned up the images with clipping paths, and boom—sales jumped. It’s that powerful.
What are the best companies offering clipping path services?
The best companies deliver high-quality edits, fast turnaround, and reliable support at fair prices.
I’ve worked with and competed against many providers. Some outsource heavily and cut corners. Look for ones with real designers, transparent pricing, and solid reviews. And yes, I offer these services too—so feel free to compare! My tip: always test with a few sample edits before committing.
Final Thoughts
Recap the value:
Whether you’re prepping photos for Amazon or polishing a portfolio, clipping paths give you clean, professional results.
Encourage reflection:
Before choosing a provider, ask yourself: Do I need consistent quality? Fast delivery? Good communication?
Invite engagement:
Got questions? Leave a comment—or send over a sample photo. I’ll show you what a clean cutout can really do.